If you are having issues like inconsistent brews, slow operations, or clogged needles and looking for the answer of how to clean Keurig needle, you have come to the right place.
From corporate offices to sweet homes, coffee brewers provide excellent service. Keurig coffee brewers work efficiently to serve coffee while everyone is busy or feels like enjoying tea or coffee with friends and family. It saves time and effort.
The first step is to unplug your Keurig and turn it upside down. You will need to use a paper towel or a cloth and wipe out any coffee residue that is left in the needle and the holder.
Keep reading to know the full steps of keurig 2.0 cleaning.
How to Clean Keurig Needle- A Complete Guide
We inform you about the Keurig coffee makers and how they can make your beverage drinking effortless. If you don’t have one, you have the choice of buying one from various Keurig models.
But if you have one and it’s not working flawlessly, this thread will help you regarding Keurig maintenance and cleaning needles.
Sputtering drinks, slow working, or brewing partial cups of coffee indicate the problem in the brewers’ needle. This writing will guide you through the whole process of cleaning Keurig needle. Therefore, even if you are not an expert, you will still be able to clean the brewer needle.
Turn Off Keurig and Unplugged
It is the very first step of cleaning the Keurig. It is simple yet essential for ensuring safety both for users and the product. You might get an electric shock if you don’t turn off and unplug the brewer. Please, take all the safety measurements, including this.
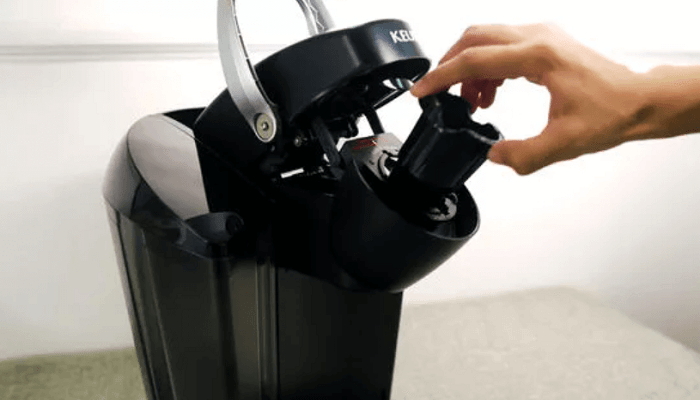
Take the Pod Holder Out of the Brewer
To do this, lift the handle like you are about to put a k-cup in the brewer. Now grab the top of the pod holder with one hand and push the pod holder up from underneath with the other hand.
Now you have the pod holder, which needs to be cleaned thoroughly.

Remove the Funnel From the Holder
Now grab the two sides of the funnel with two hands and rotate the two parts in opposite directions. After that, pull the two pieces apart.
If it’s the first time for someone, the thing may look complicated. In that case, place the pod holder under running hot water or soak it for a couple of minutes. This will loosen the connection. Now try to reapply the above procedures.
Clean the Tube of the Pod Holder Bottom
It would be the best if you had a paper clip or similar object to clean the bottom tube of the pod holder. You may use a toothpick, for this very purpose. Insert the straightened paper clip or similar object in the tube. Slowly move it around for a minute.
It will loosen any clogged particles and pores. Do not force hard if you get any resistance. This may break small essential particles.
Rinse the Pod Holder and Funnel with Water
Rinse the pod holder and funnel with water. You can use a dishwasher and cloth or sponge to loosen up existing filth. Try to use the pressure of tap water or similar equipment. While doing this, be careful that you don’t get poked by the exit needle.
Dry out the pod holder and funnel properly.
Find the Entrance Needle Under the Brewer Head
Lift the handle of a Keurig coffee brewer, same as when you are about to put a k-cup. The entrance needle of the Keurig is located on the underside of the top half.
Loosen up Clogging From the Entrance Needle With the Paper Clip
After locating the entrance needle, insert the straightened paper clip into the openings on both sides of the needle. Move it gently to loosen up any grime and knock away any caked-on grime.
While performing this needle cleaning, be cautious about the entrance needle as it is very sharp.
Put the Pod Holder and Funnel Back Together
Dry out the pod and funnel fully. Now, place the side slots and push the two parts together. There will be a very clicking sound when it gets together.
Reassemble the Pod Holder
Align pod holder tabs with the opening of your brewer. Place the two tabs on the bottom and a single tab on top. Snap it into place by pushing down on the top rim while holding your brewer with the other hand.
Run a Couple of Brews With Water Only
Plug the machine into electricity and prepare it for running. Fill the water reservoir with water on it and put a large mug on the unit’s tray. Run a couple of brewing cycles of water to flush out any grime and pores that you have loosened up.
Conclusion
Keurig coffee makers are a piece of equipment that makes our life easier. But sometimes, this great thing can get clogged due to the lack of proper maintenance. The guide for resolving the grime clogging issue has been properly provided in the above section.
If you read the guideline of how to clean Keurig needle thoroughly, you will be able to clean Keurig easily.